
ANF Backup
In my last post we talked about ANF Snapshot policy, this feature enables point-in-time recovery of volumes. In this post I’m going to talk about ANF backup policy. This is a relatively new feature in Azure NetApp Files and it is, as of writing, in public preview within certain regions. The ANF backup policy feature enhances the data protection capabilities of ANF by adding the ability to backup data within the ANF service.
Backups are kept in Azure Storage, this is separate to the volume snapshots which are used for short-term recovery or the cloning of volumes. The backups taken using ANF backup policy are restored to new ANF volumes, these volumes are within the same region as the source volume.
As with ANF snapshot policy, ANF backup policy can also use scheduled policy or on-demand manual backups. When using the scheduled ANF backup an enabled snapshot policy is required. If you are using Cross Region replication (CRR), ANF backup can only be enabled on the source volume, not the destination volume.
The pricing for ANF backup is calculated on the amount of storage used for backup. The other charge to be aware of is the cost of restoring data, this is based on the amount of data restored during your billing period.
Enable backup
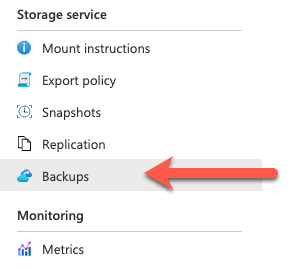
1. First, enable the backup feature for the volume you want to backup. To do this browse to the ANF blade, under the Storage service select the backup feature.
2. Next, select Configure in the top bar.

3. In the configure backups option, enable this feature.
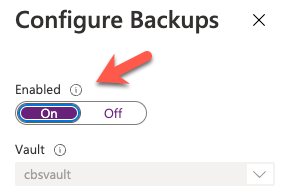
4. Once enabled, click OK
Configure a manual backup
Now that you’ve enabled backup on the volume, let’s go and create a manual backup.
1. Browse to the volume that you just enabled for backup.
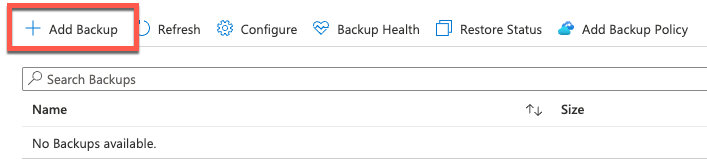
2. In the top bar, select Add Backup
3. Give your backup a name. Tip: As a best practice, always prefix backup name with account name and volume name for easier identification of the backup in account backup listing. An example of naming has been included below.
NetAppAccountName-CapacityPoolName-VolumeNameYou can also choose to use a snapshot that already exists. To do this, select the Use Existing Snapshot option.
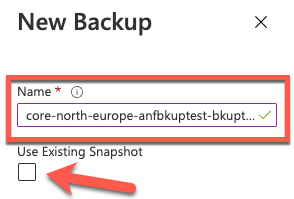
4. Once completed, click Create.
Configure policy based backup
Using policy base backup, you can protect your volumes automatically by applying a schedule with predefined intervals and retentions.
1. In your ANF account, select Backups
2. In the top bar, select Add Backup Policy

3. Next, configure the Backup policy as required. An example has been included int he image below.
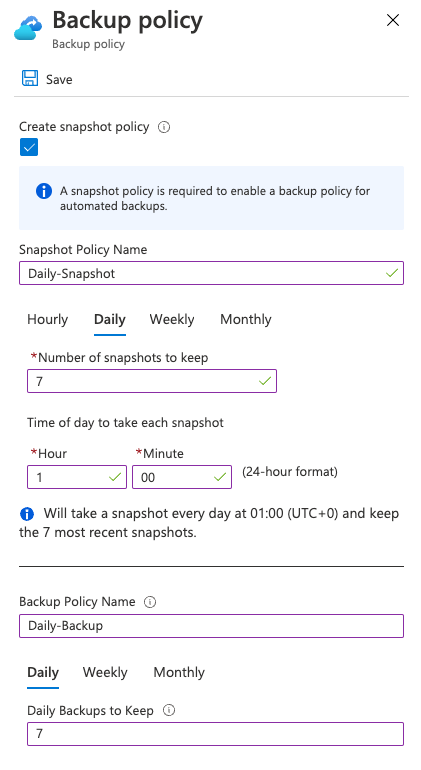
4. Once configured, click Save.
5. Now that you have configured your backup policy, you need to apply it to the volume(s) you wish to backup. To do this, select the volume, choose Backup and in the top bar select Configure.
6. Enable the backup feature and select the snapshot policy and the backup policy you created previously.
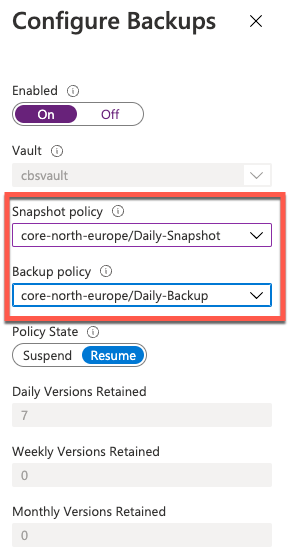
7. Once completed, click OK.
8. That’s it, you have now created an ANF backup policy and applied it to a volume.
Summary
This post was a follow-on from my last about ANF Snapshot Policy. Having the ability to backup ANF independently without the need to invest in a third-party backup product greatly reduces the overheads of additional software, as well as the management and monitoring of that software. Being able to implement a schedule to backup your data is another fantastic example of how far the ANF as a service come since its release. This feature makes it extremely easy to respond to business needs for restores, whilst maintaining its simplicity. The ANF service is constantly being updated and improved by Microsoft, to see whats new with ANF check the link here. If you would like to learn more about Azure NetApp Files, check out the Microsoft docs pages here.